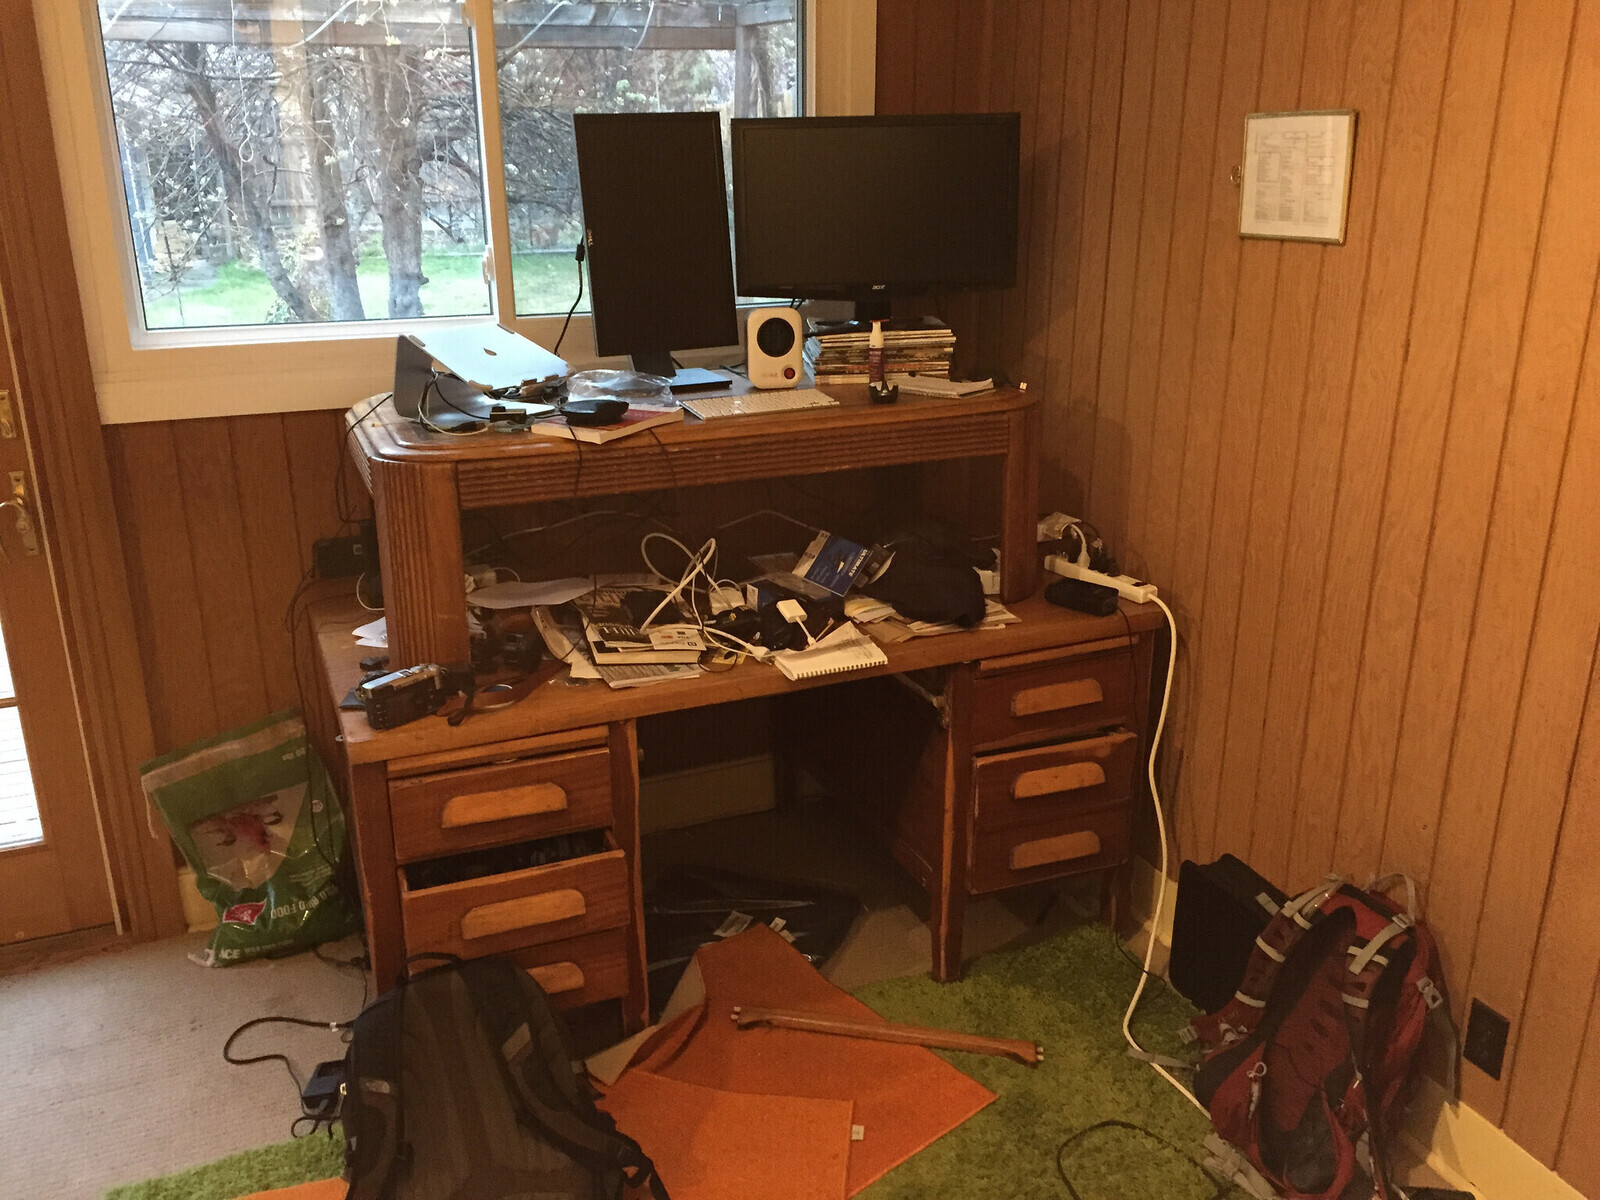
2016! A few more days of break, so time for a little project. Why not make myself a more permanent standing desk? I mean, this just won't do any longer:
- Sufficiently wide (60" or more) but not too deep (definitely <30")
- Adjustable height between at least 35" and 45" so I can stand but also sit (on a stool)
- No more than $200
- Nice looking
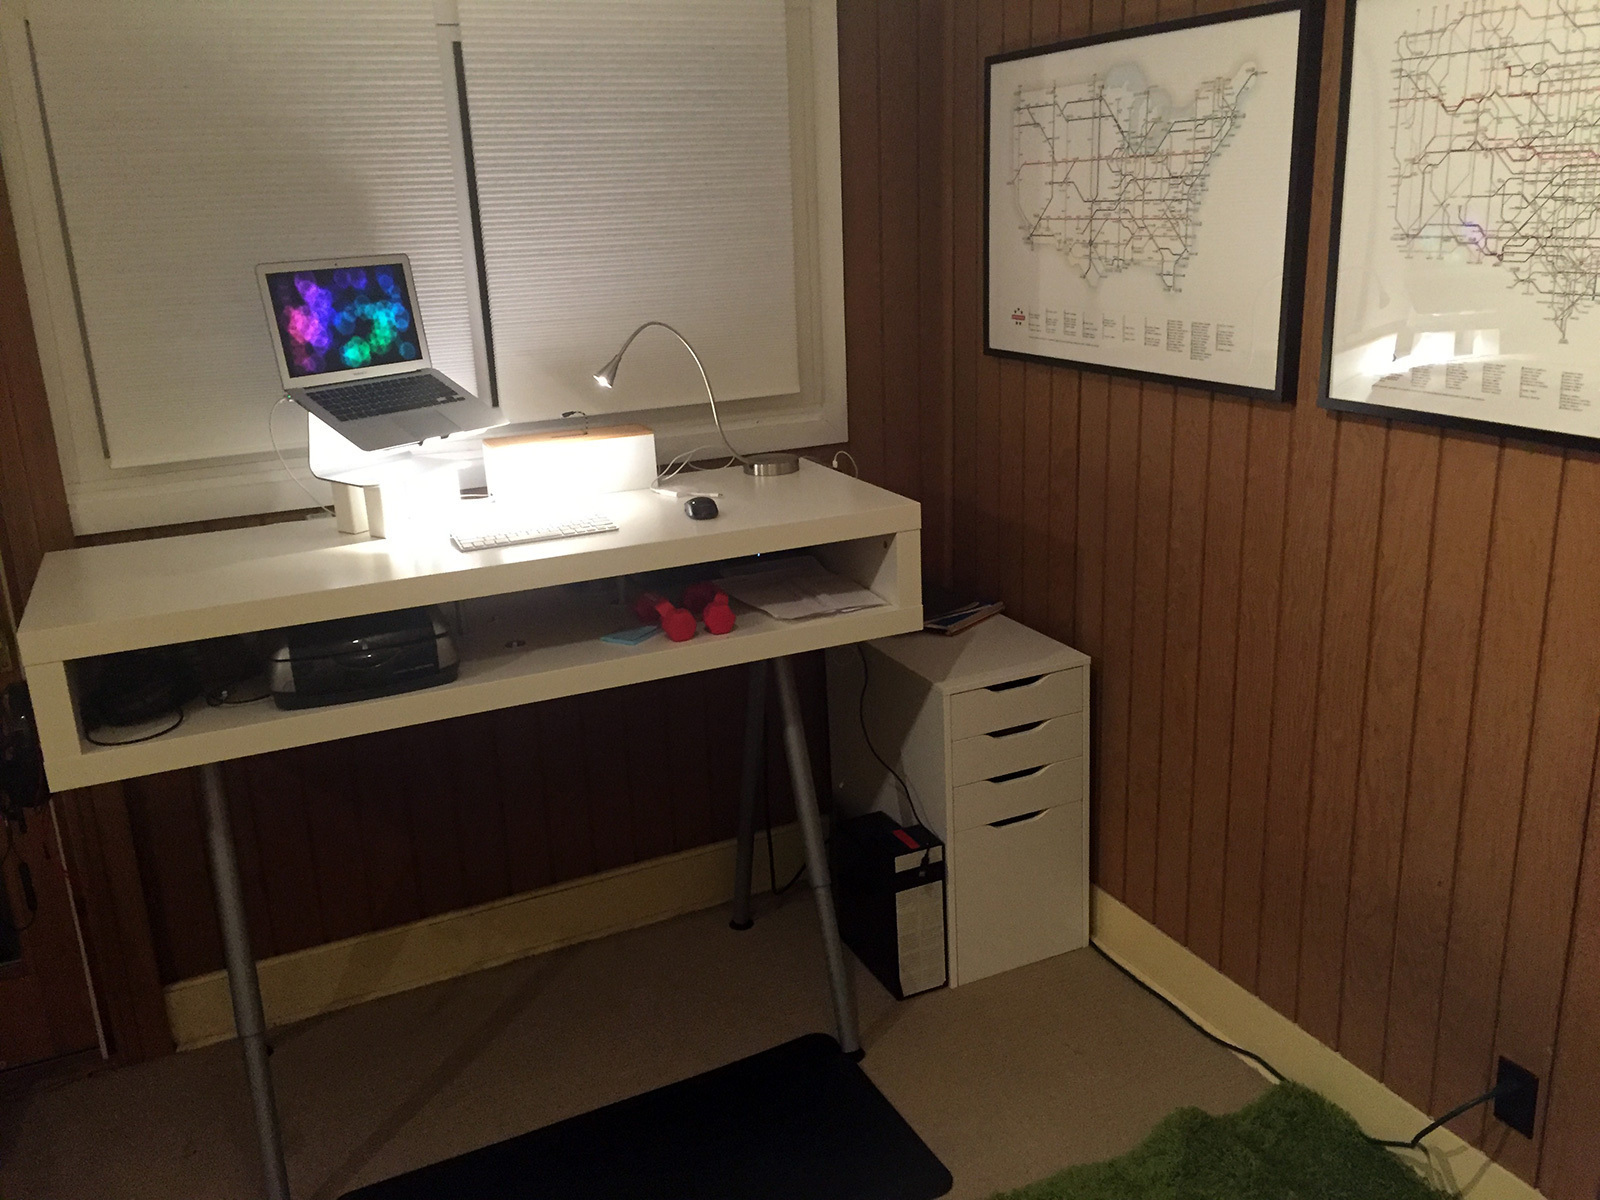
I ended up with this:
Here is what I did.
Research #
I started looking around on the web a bit. Nice looking standing desks easily run more than $500. The Wirecutter had a pretty thorough look at standing desks recently. A pretty plain looking $750 desk came out on top.
My thinking was that it could be done for less, with a prettier result.
So I poked around a bit in the maker / hacker community. There is a ton of creative ideas out there by folks who want a standing desk but are not happy with what you can buy. A lot of them base off of Ikea components. That makes a lot of sense. Ikea has some decent, sleekly designed stuff that does not cost a lot.
I really liked this desk by Jessica Allen / spacekat:

This desk design ticked a bunch of boxes: cheap, good looking, adjustable in height, and a good size desktop space. So let's make something a lot like that!
Ikea would not be Ikea however, if they still carried the stuff Jessica used back in '12 when she built this. The LACK TV unit seems to be a stayer, but the GALANT leg / frame set she used are no more. Some poking around on the IKEA site turned up the THYGE desk that seemed similar enough. I just wish they had it in shiny chrome!
Okay, off to the suburbs to get stuff!
Buying + Building #
The first stop was my local Ikea store.
Pro tips for shopping at Ikea:
- Sneak in past the registers so you don't have to snake your way though the endless showroom displays to get to the good stuff: the warehouse that has the things you need.
- Make a shopping list on ikea.com on your phone, and it will tell you which aisle and bin hold the items on there.
- Don't fall for the cinnamon rolls.
Here is what I got:
- Ikea LACK TV unit, $50
- Ikea THYGE legs, $60
(Ikea.com has you believe that the legs / frame and the desk top have to be bought together for $100, but this is a lie.)
Next, to the hardware store. The THYGE frame is not the same as the GALANT, so you will need longer bolts. I also opted for slightly fatter ones. Instead of regular nuts, I opted for wing nuts to make (dis)assembly easier.
What I got:
- 6x 3/8" x 3 1/2" bolts
- 6x 3/8" x 1 1/2" washers
- 6x 3/8" wing nuts
This was something like $4, bringing the grand total of the base desk to $114 - not bad!
For the construction, I basically followed Jessica's lead. No surprises there.
Setup / Final Touches #
With construction complete, I turned to the finishing touches. First the optimal height. For me, at 5'11", around 44" is a good standing desk height. That meant adjusting the legs to 90...(unsure what unit they use)

Lastly I added some bells and whistles to improve usability.
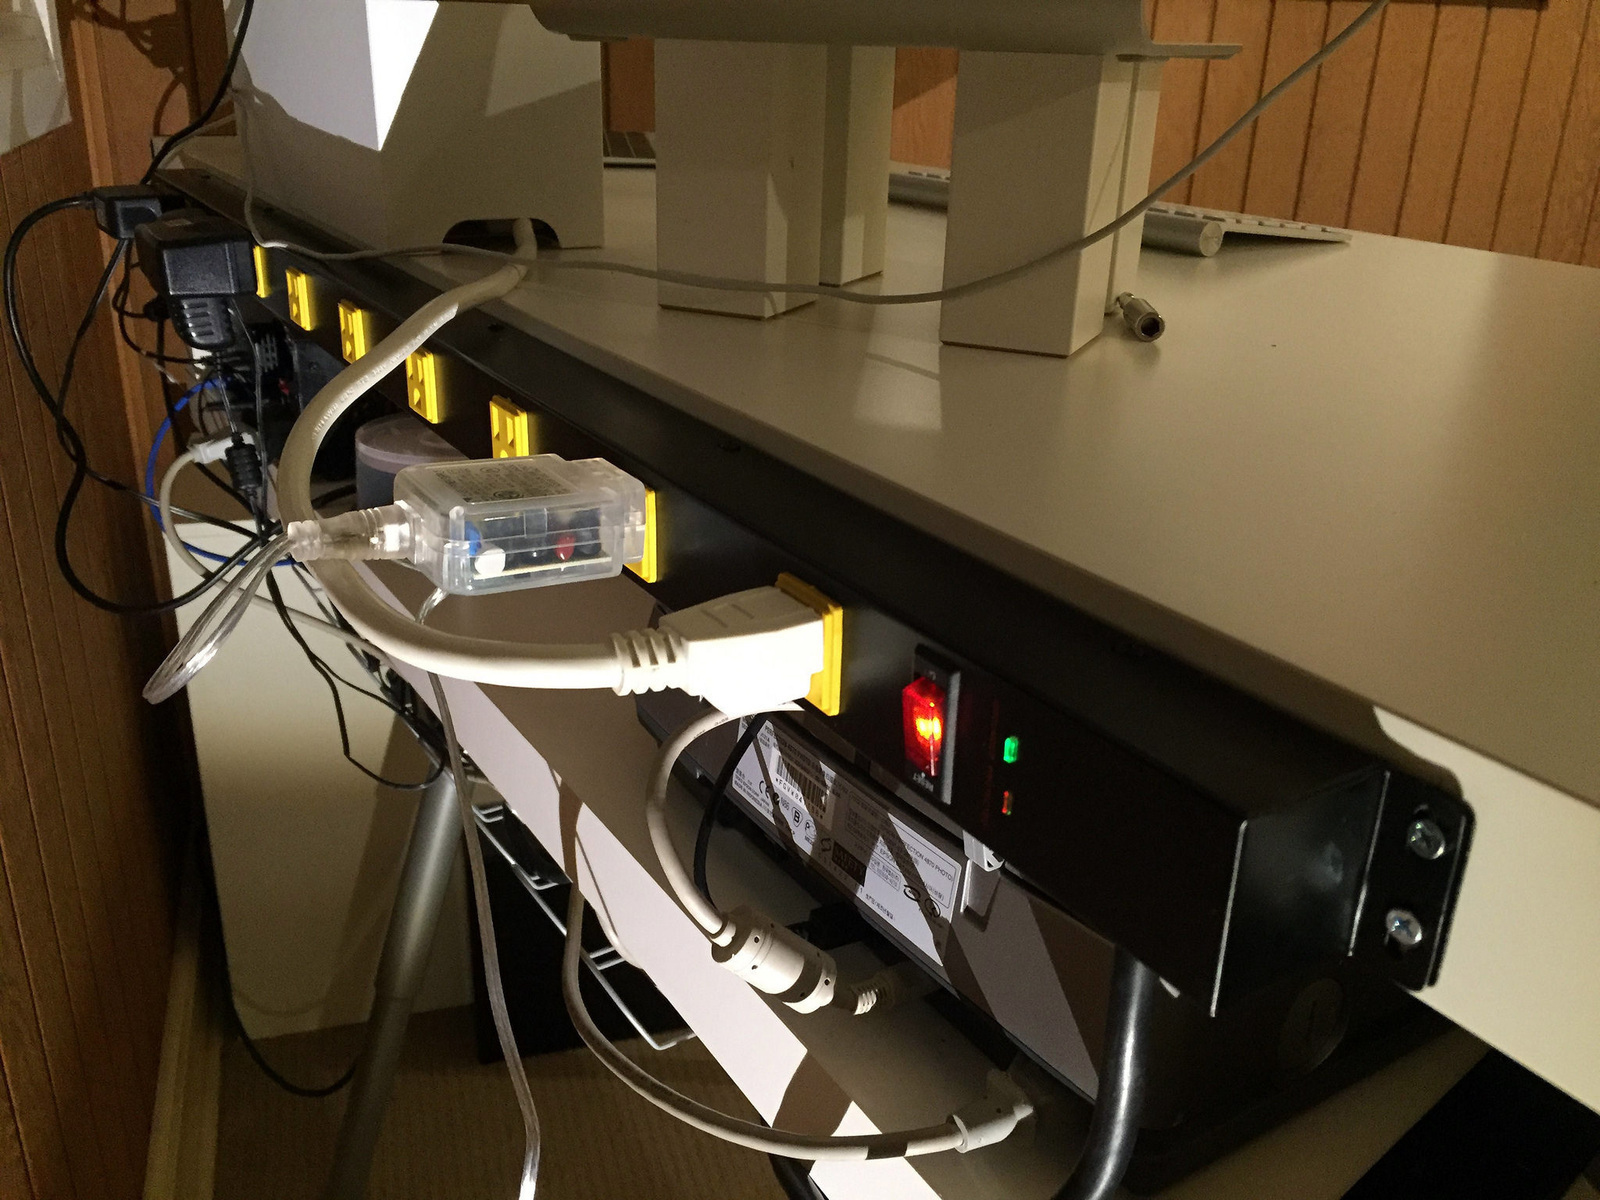
I spent $30 on a workshop power strip which I screwed onto the back of the desktop. You can never have enough appropriately spaced outlets!
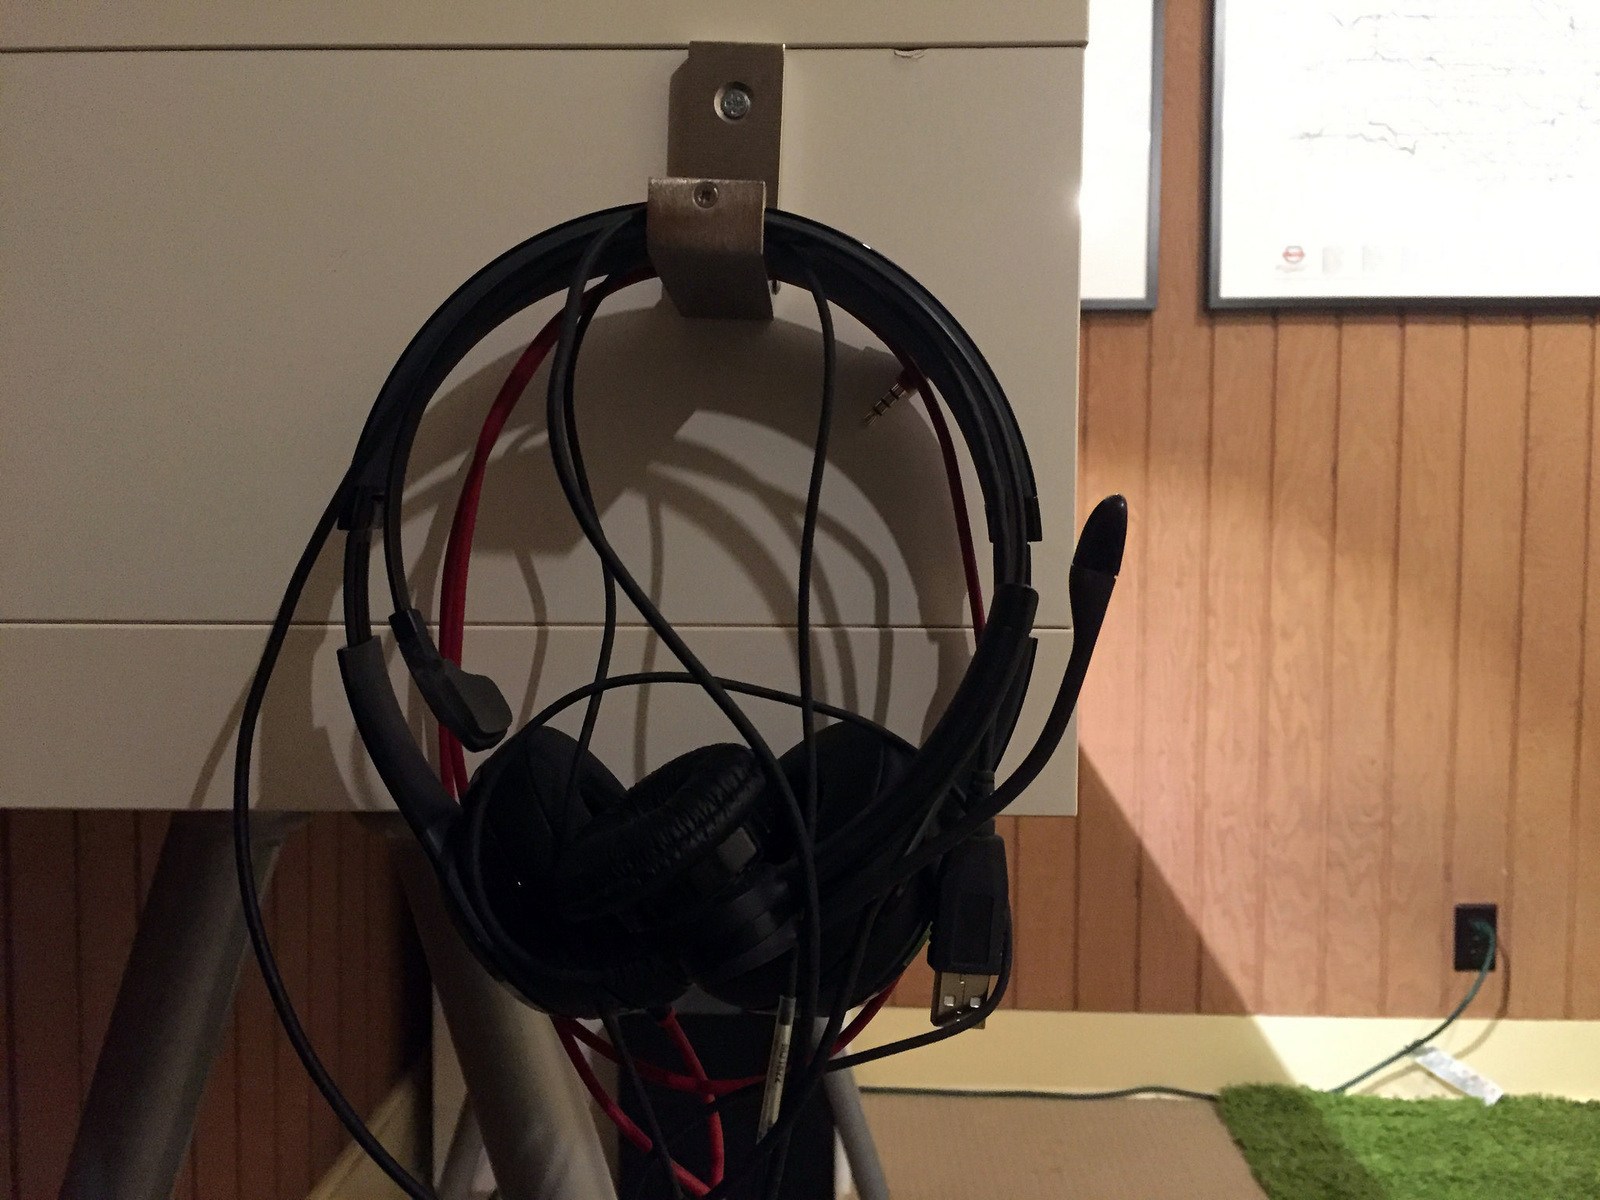
I also screwed an Ikea BJÄRNUM hook ($10 for 3) into the left side of the desk to hang headphone / headset. These hooks are cool because they fold up when not in use.
I mounted an Ikea SIGNUM cable management rack ($10) to the bottom, and got an Ikea KVISSLE cable management box (also $10) to keep cable messes from hanging off / sitting on my pristine desk.
Oh finally - don't discard the (unused) LACK legs - they turned out to be the perfect height to prop up my mStand laptop stand!
This was an afternoon well spent. I am enjoying my new desk. My main concern up front was that it would turn out wobbly, but the desk is solid as a rock when typing / cats jumping and off.