Mapillary 360° capture part 2: bike #
I posted a couple of days ago about my first captures with the GoPro MAX camera I have on loan and uploading to Mapillary. This all went pretty smooth, so I wanted to capture while biking. I bike around town a fair amount and you can cover more ground in the same amount of time compared to walking, so I was eager to try it.
Years ago, I captured Mapillary imagery with my regular GoPro HERO 3+ camera mounted on my bike:
I remember from back then (2014) that the uploading process was not super straightforward, but Mapillary was only 1 year old then, so that was to be expected.
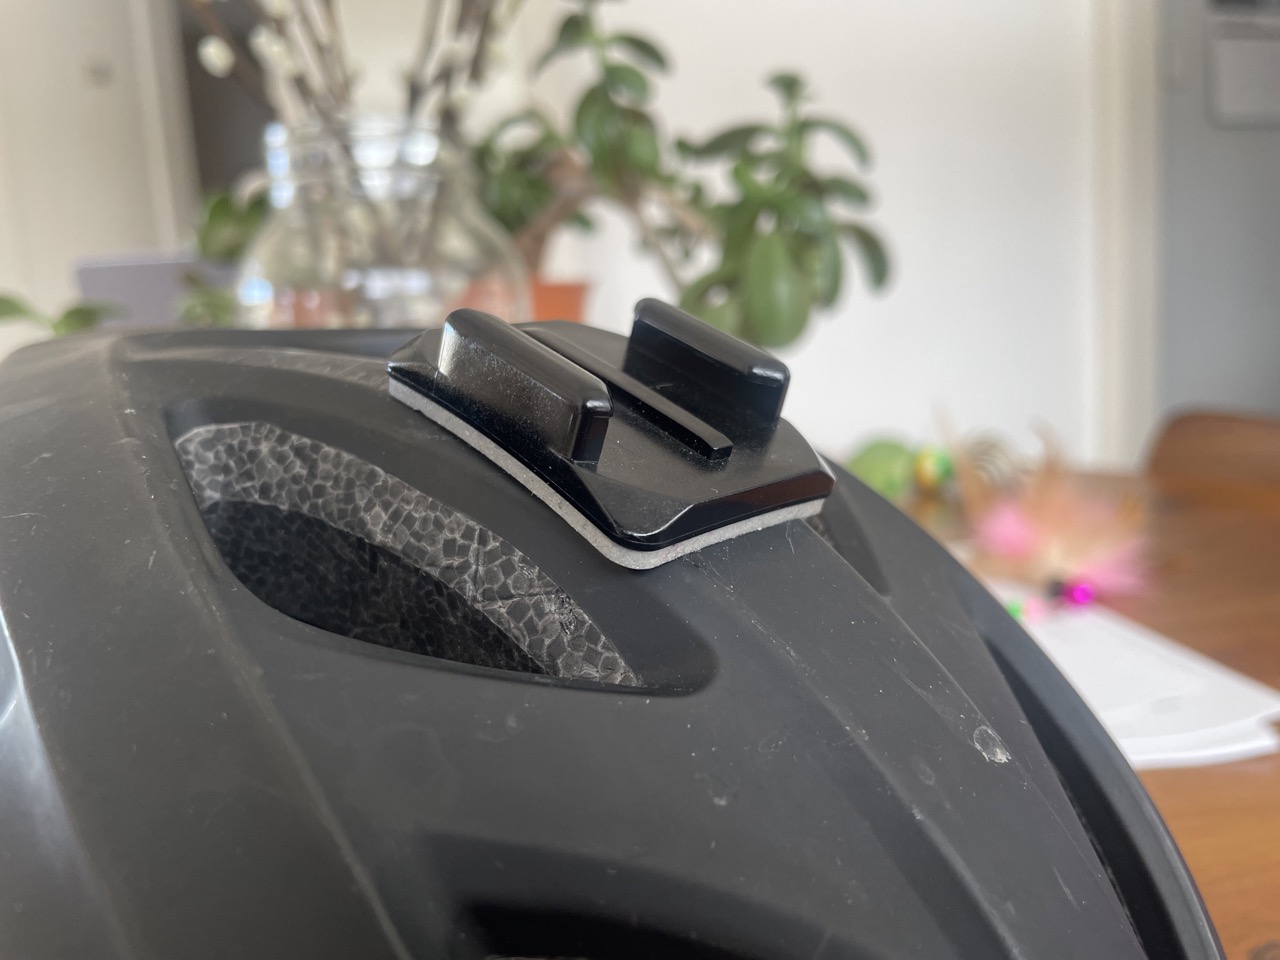
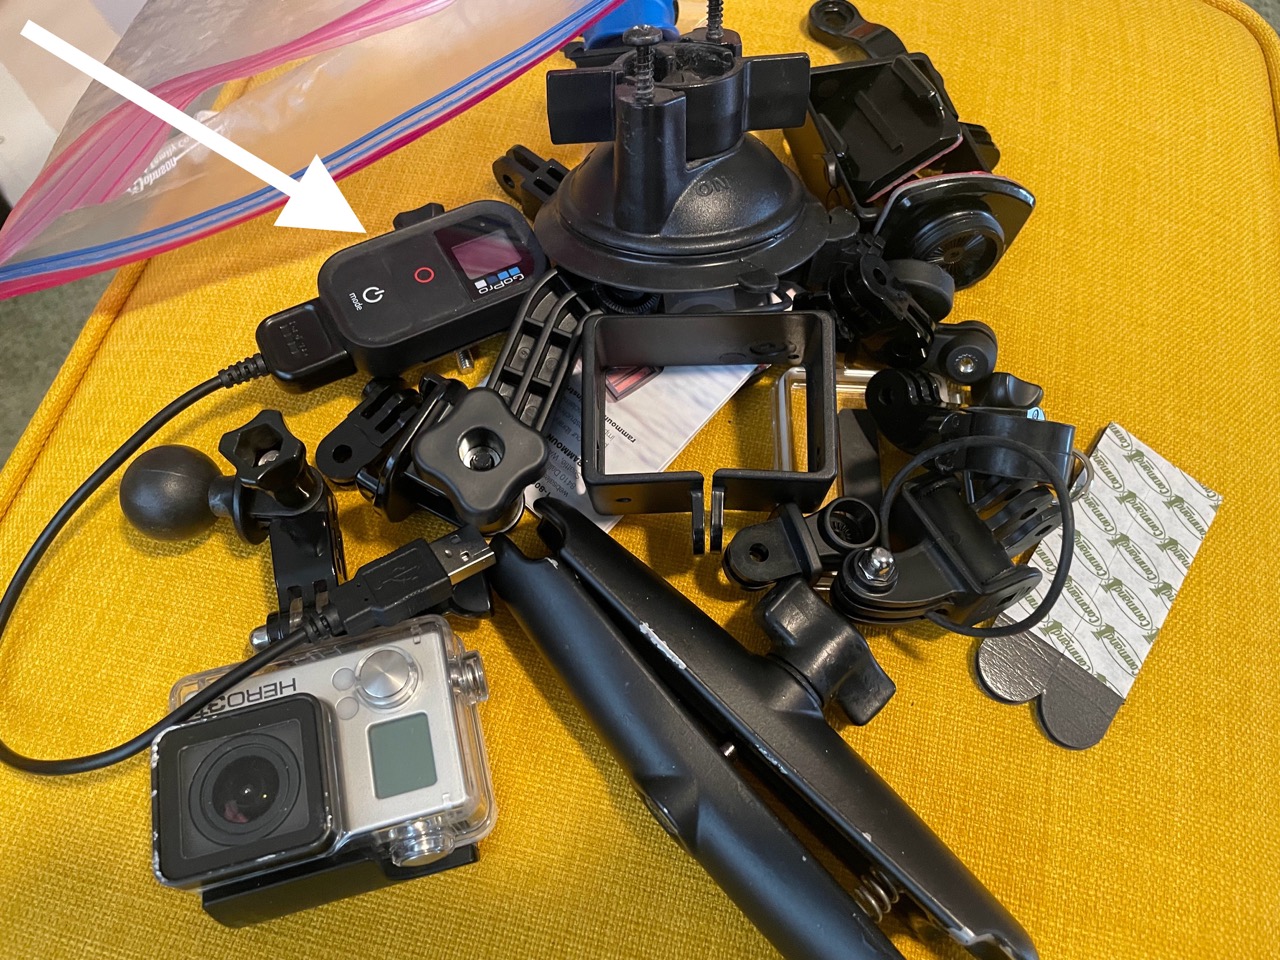
I still have some of the accessories from my HERO 3+, like a helmet attachment and a quick-release adapter. The accessory interface on the cameras hasn't changed, so those things work even with the most recent GoPro cameras. Here's the helmet attachment with quick-release shoe:
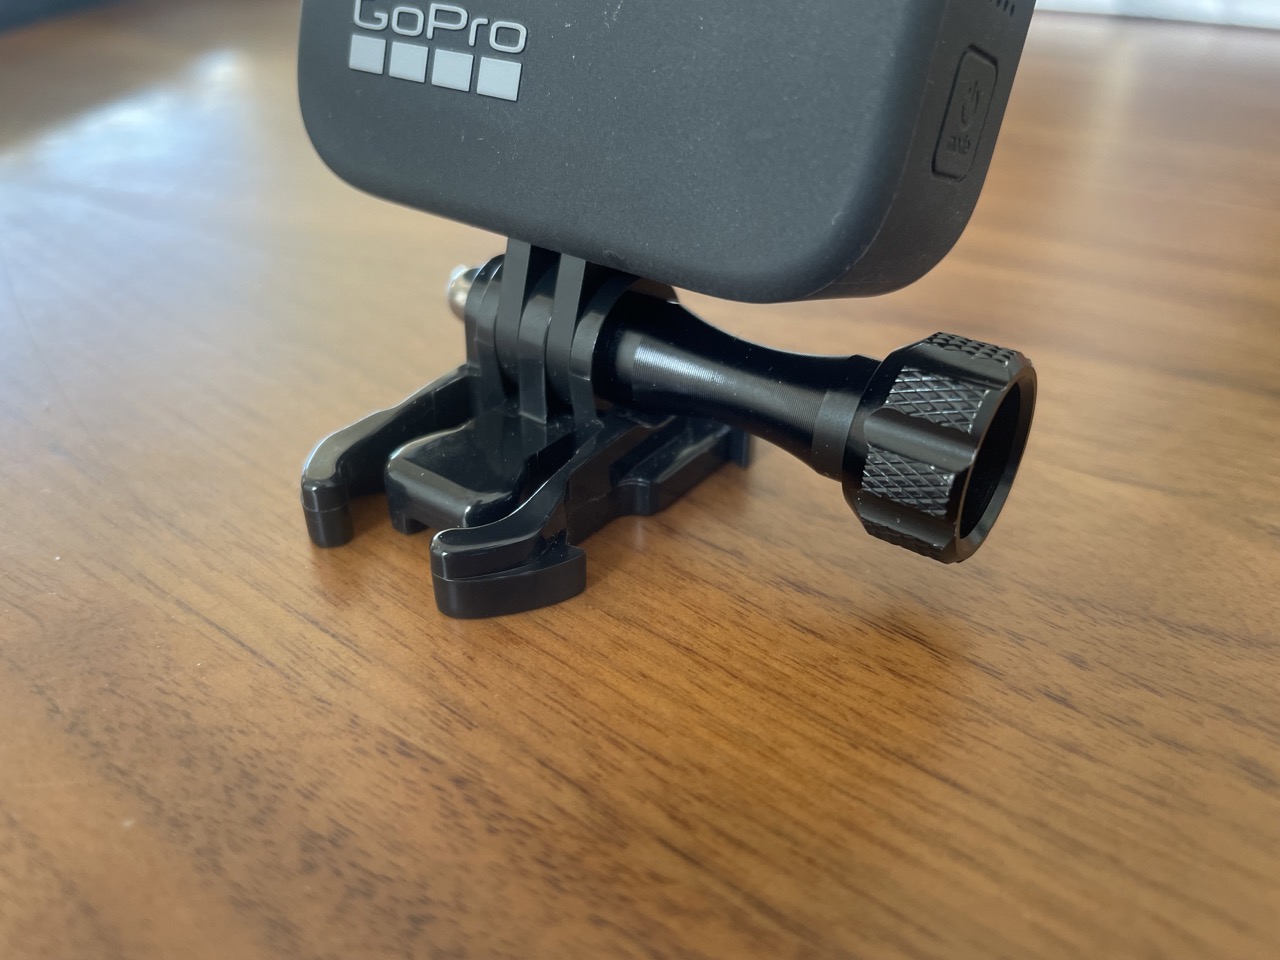
Here's the quick-release adapter attached to the GoPro MAX:
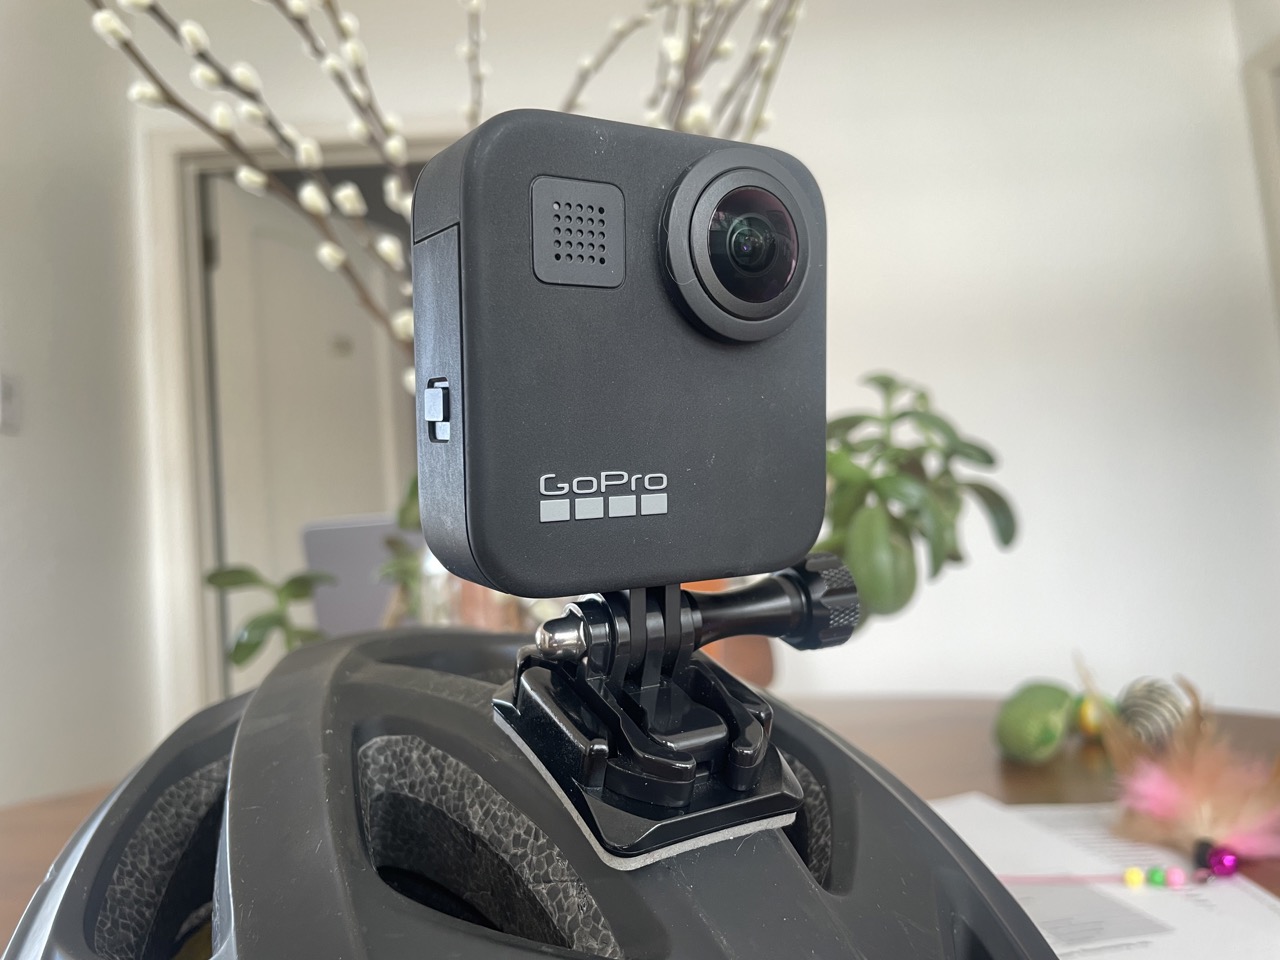
And here is the camera mounted on my helmet:
Time to get going! I set the camera to 360° time lapse mode with 2 second interval. 2 seconds is the shortest interval you can set with 360 degree images. (If you use only the front camera you can set the time lapse interval to as low as 0.5 seconds.)
Riding around #
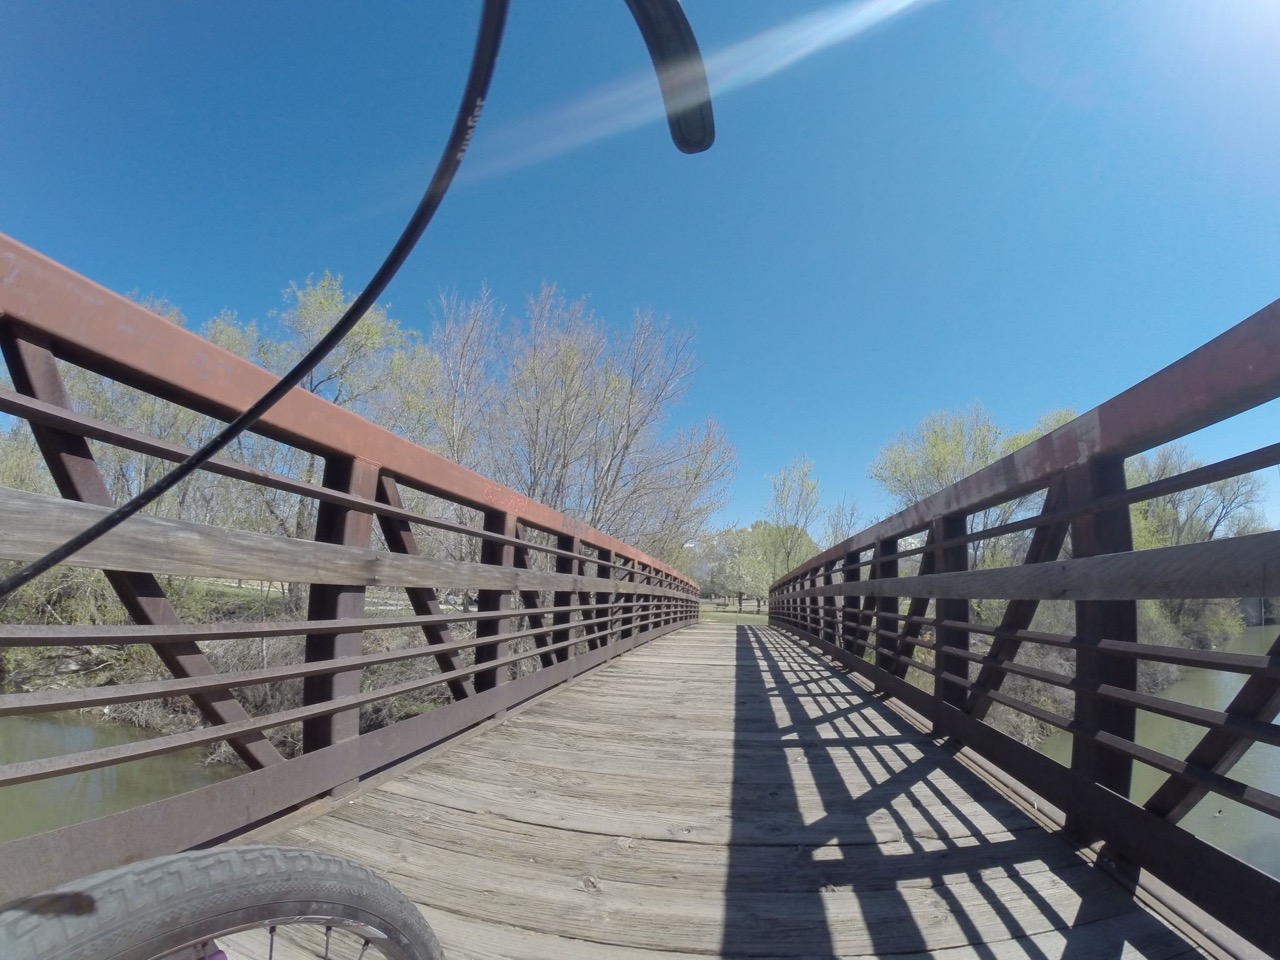
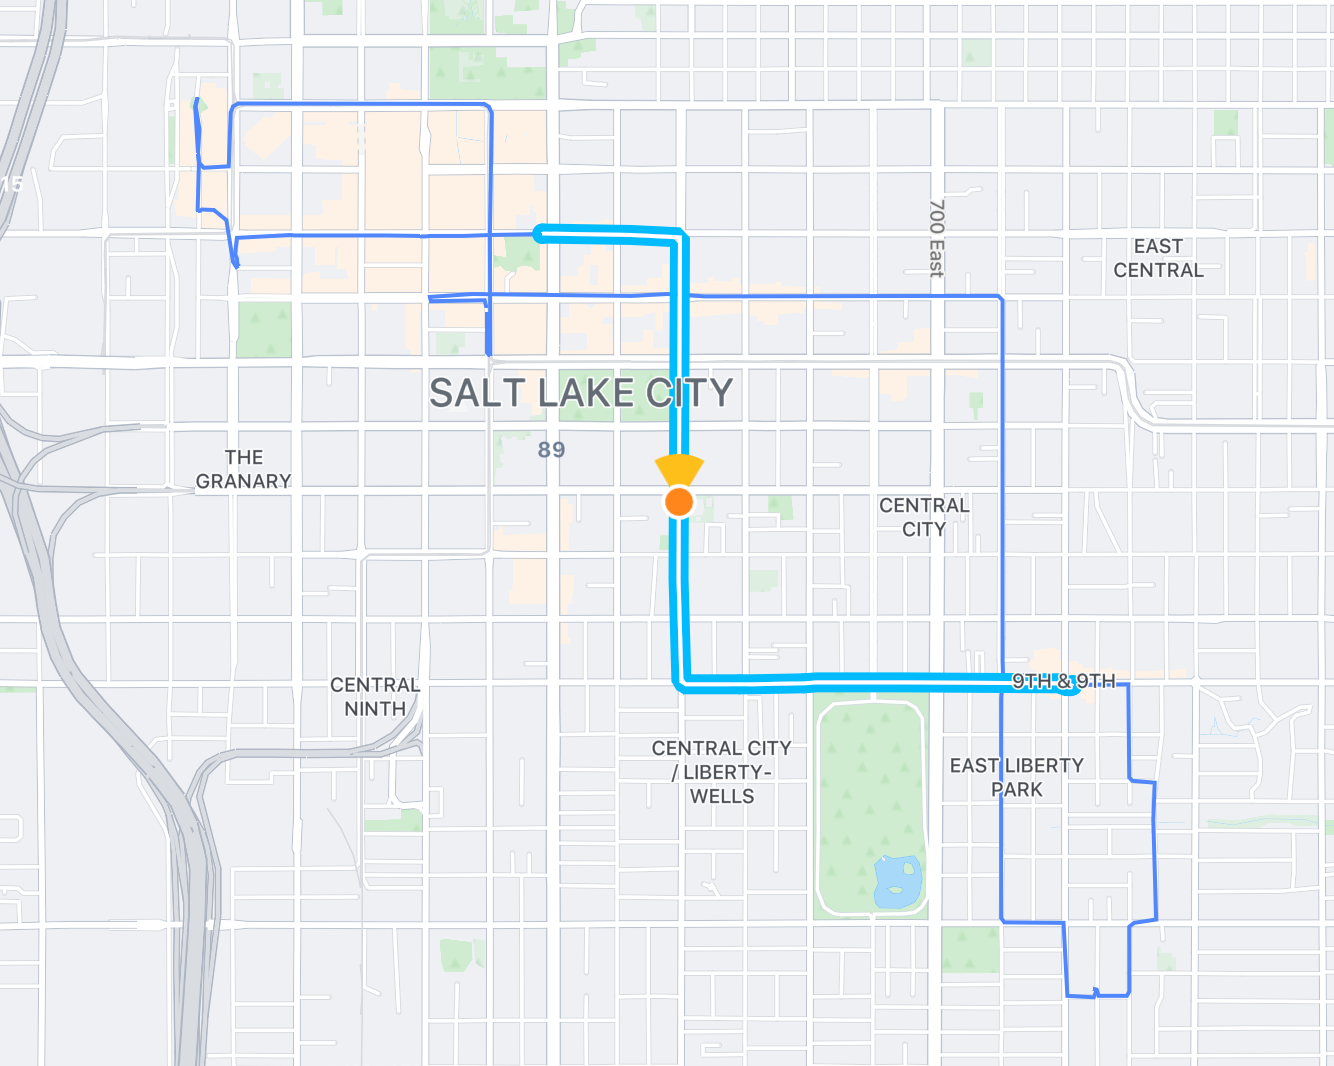
As a test, I rode around between my house and downtown Salt Lake City for about an hour:
Being used to a normal forward-facing camera or phone for capturing, I was worried that I would have to keep my head straight and I would mess up my captures by looking up / left / right / down. But with this being a panoramic camera, that doesn't matter. Important, because I need to be able to look around to be safe.
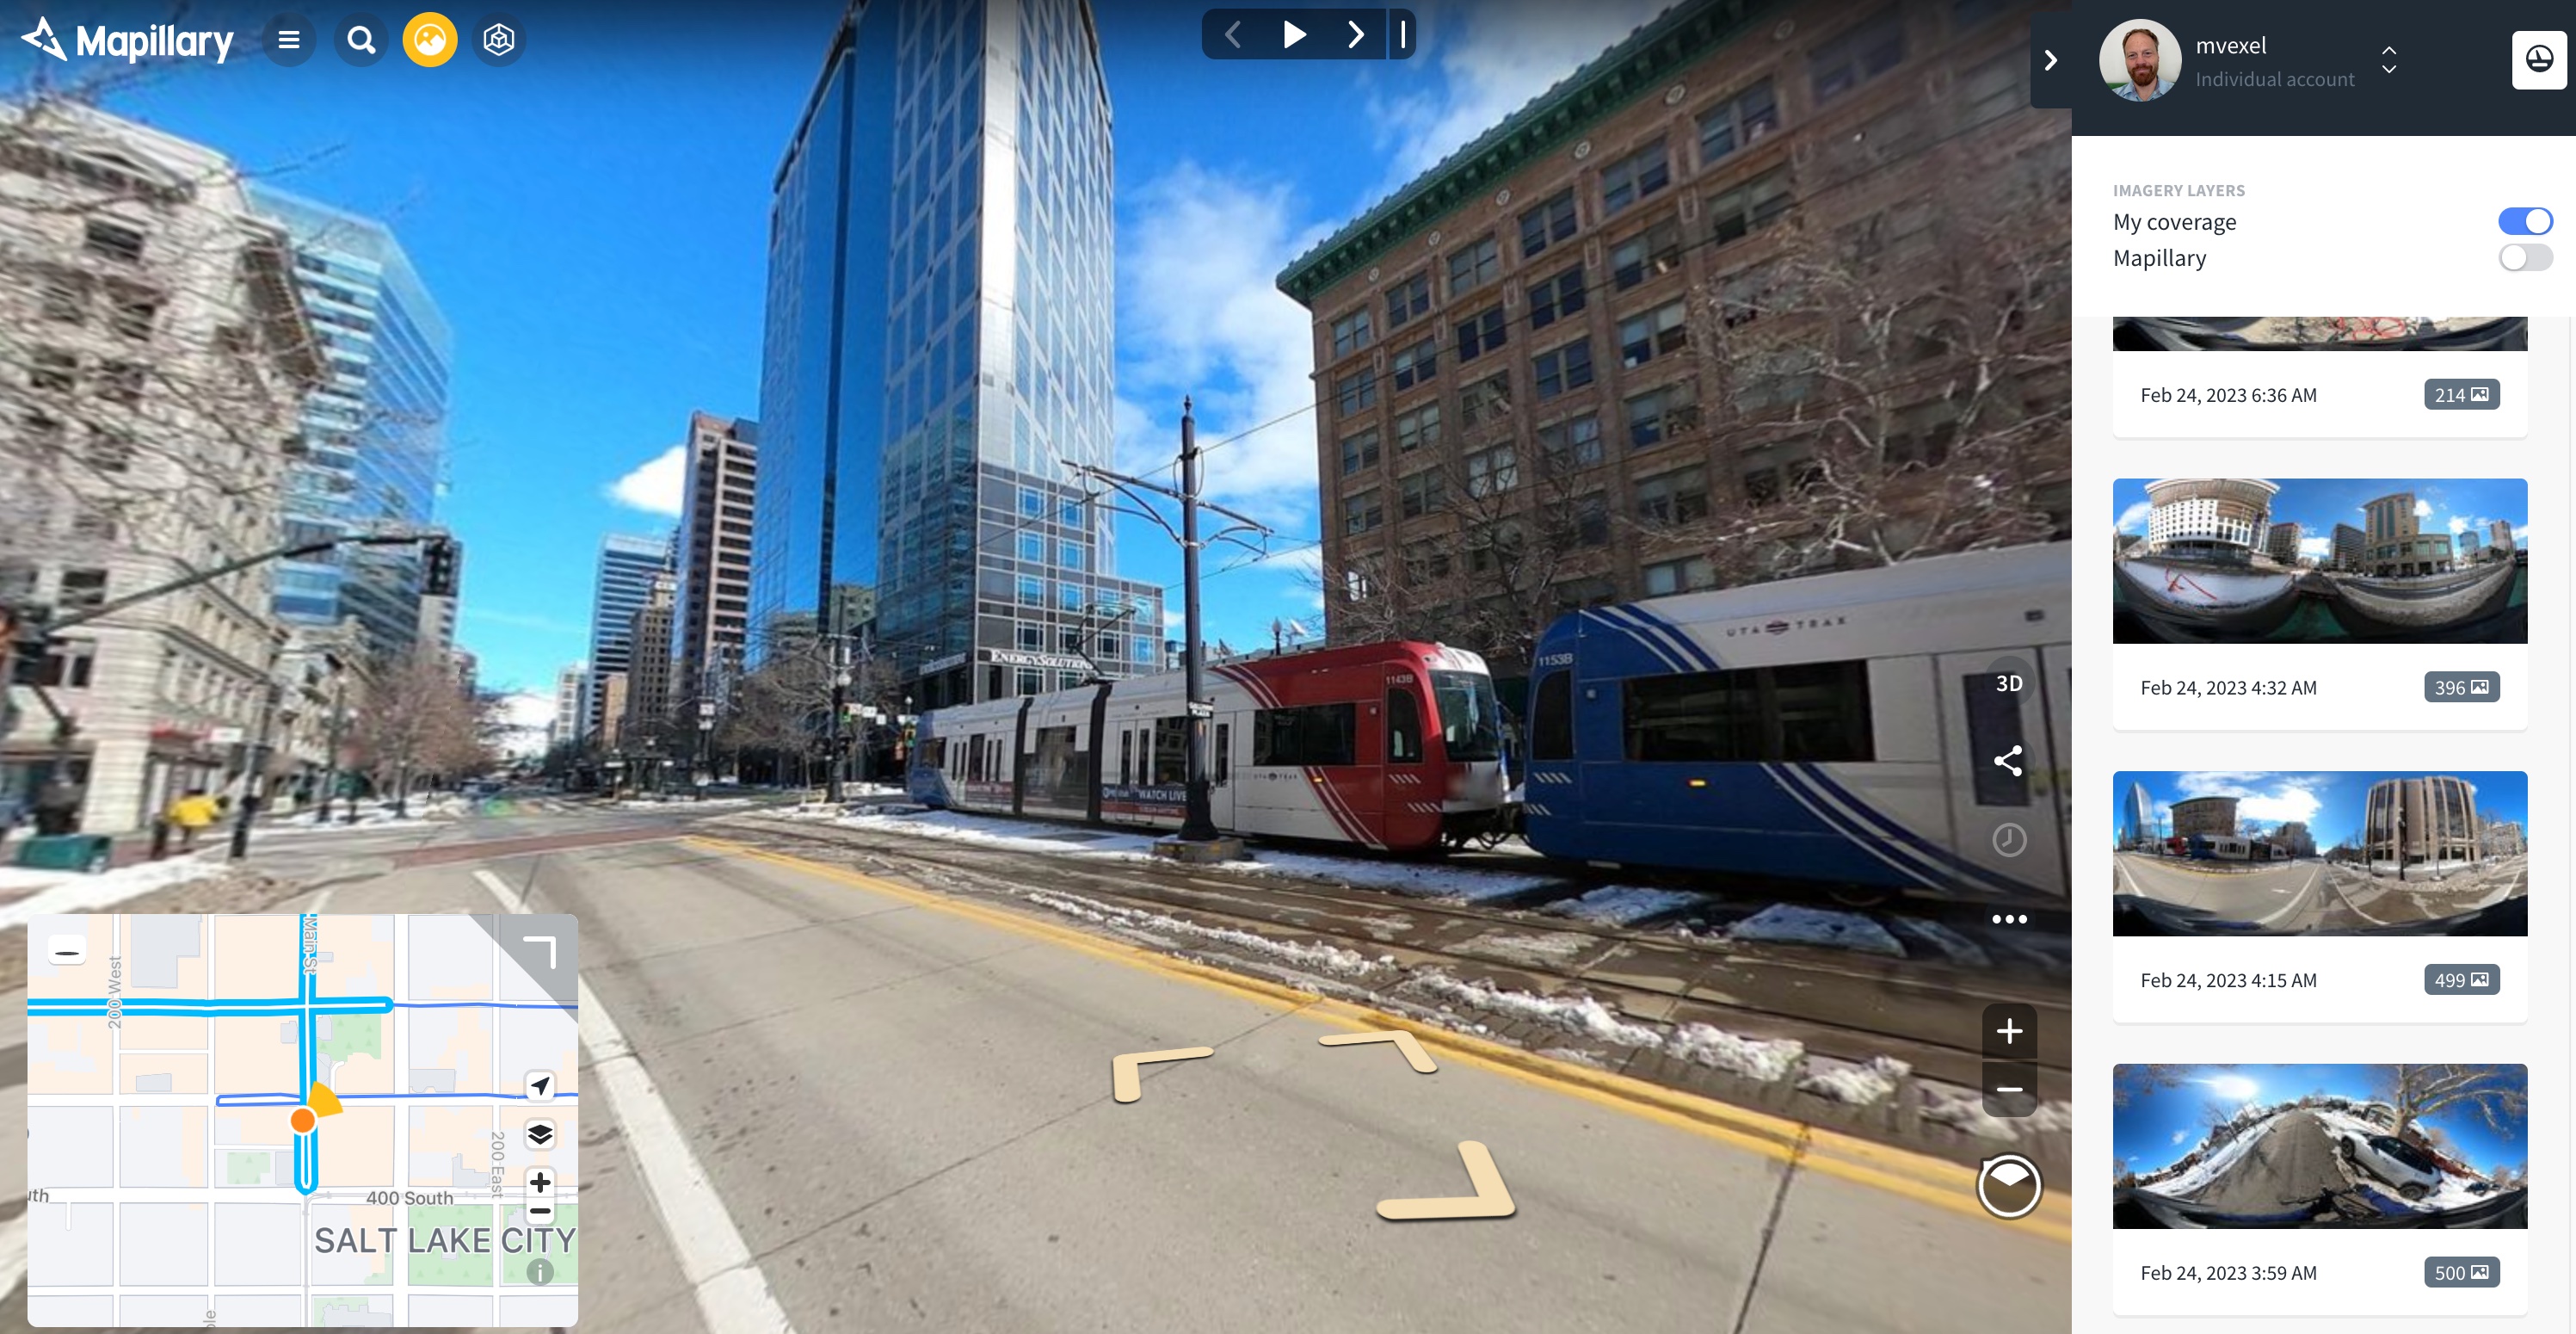
I uploaded by dragging the entire folder of images straight from the MicroSD card to the Desktop Uploader, and that just worked.
Less than a day later, my sequences are on the Mapillary website. (I couldn't see them in the JOSM plugin yet, I think there must be some additional delay before the API exposes new sequences?
Findings and what next #
App: sucks #
I decided to give the GoPro mobile app a try. From what I remembered, you can connect to the camera using wifi or bluetooth and use it as a remote control of sorts. It would be nice to be able to quickly check the status of the camera without having to stop and take my helmet off.
The app is called "Quik" now and my experience was not good. The app will connect to the camera only about half the time and it nags you constantly to take out a subscription to upload everything you do to the cloud.
Fortunately, another accessory from the HERO 3 days I still had was a physical remote control!
Remote: win! #
After a bit of rummaging through my GoPro accessory bag, I found the remote.
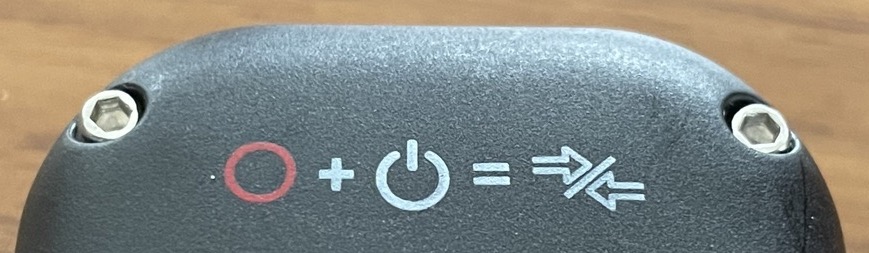
The remote is a simple but nicely made piece of equipment. The model number is ARMTE-001. I guess this is the first remote they ever made?
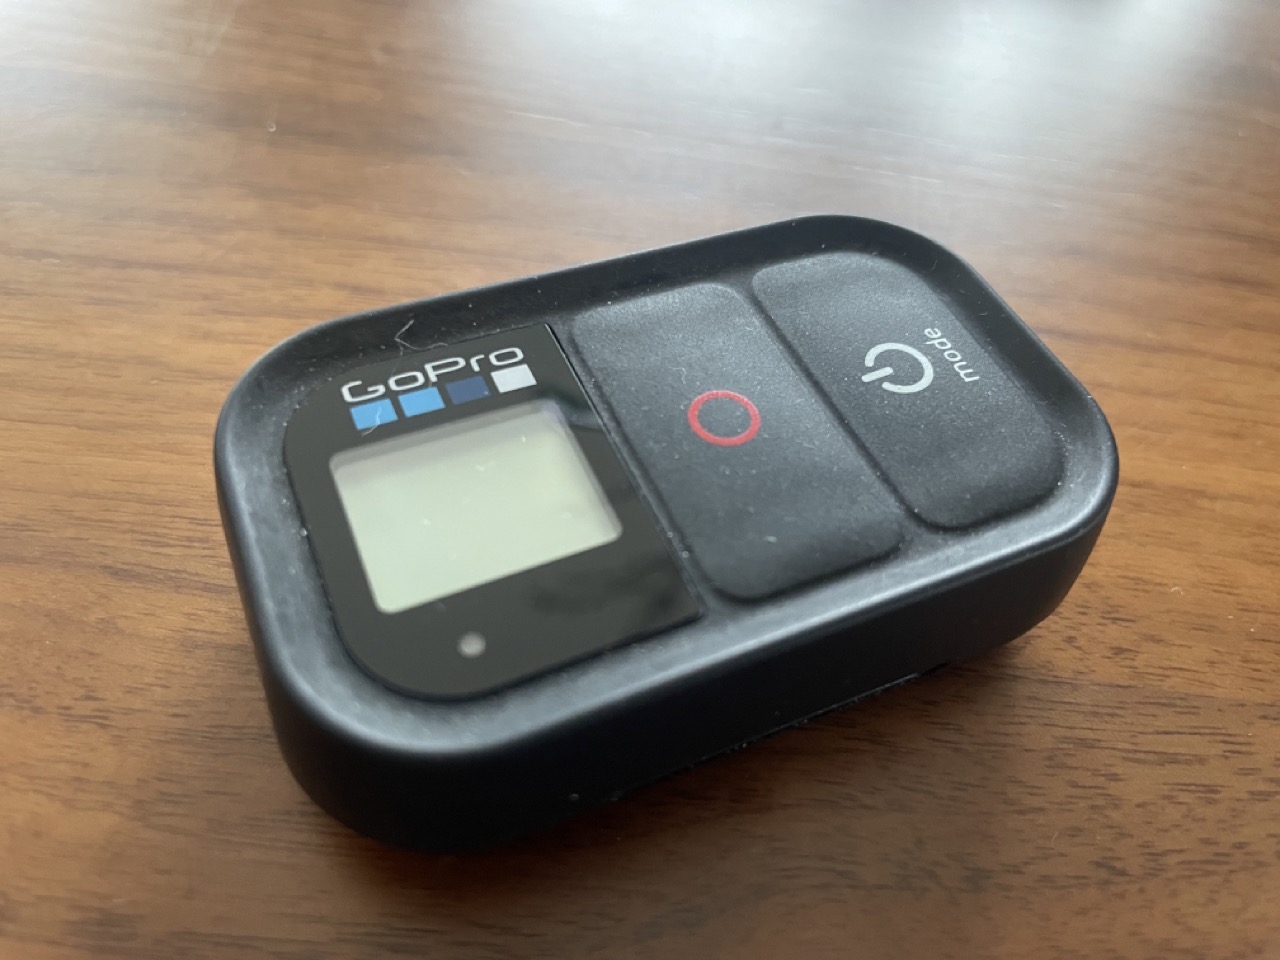
Again, I bought this at the same time I bought my HERO 3+, back in 2014. So I was ready to be disappointed in a multitude of ways: I might not be able to charge it, it may be dead altogether, or just not work with a 2022 GoPro camera.
Imagine my surprise when it ... just kind of worked! I did still have the charging cable, which has perhaps the strangest connector I have ever seen:
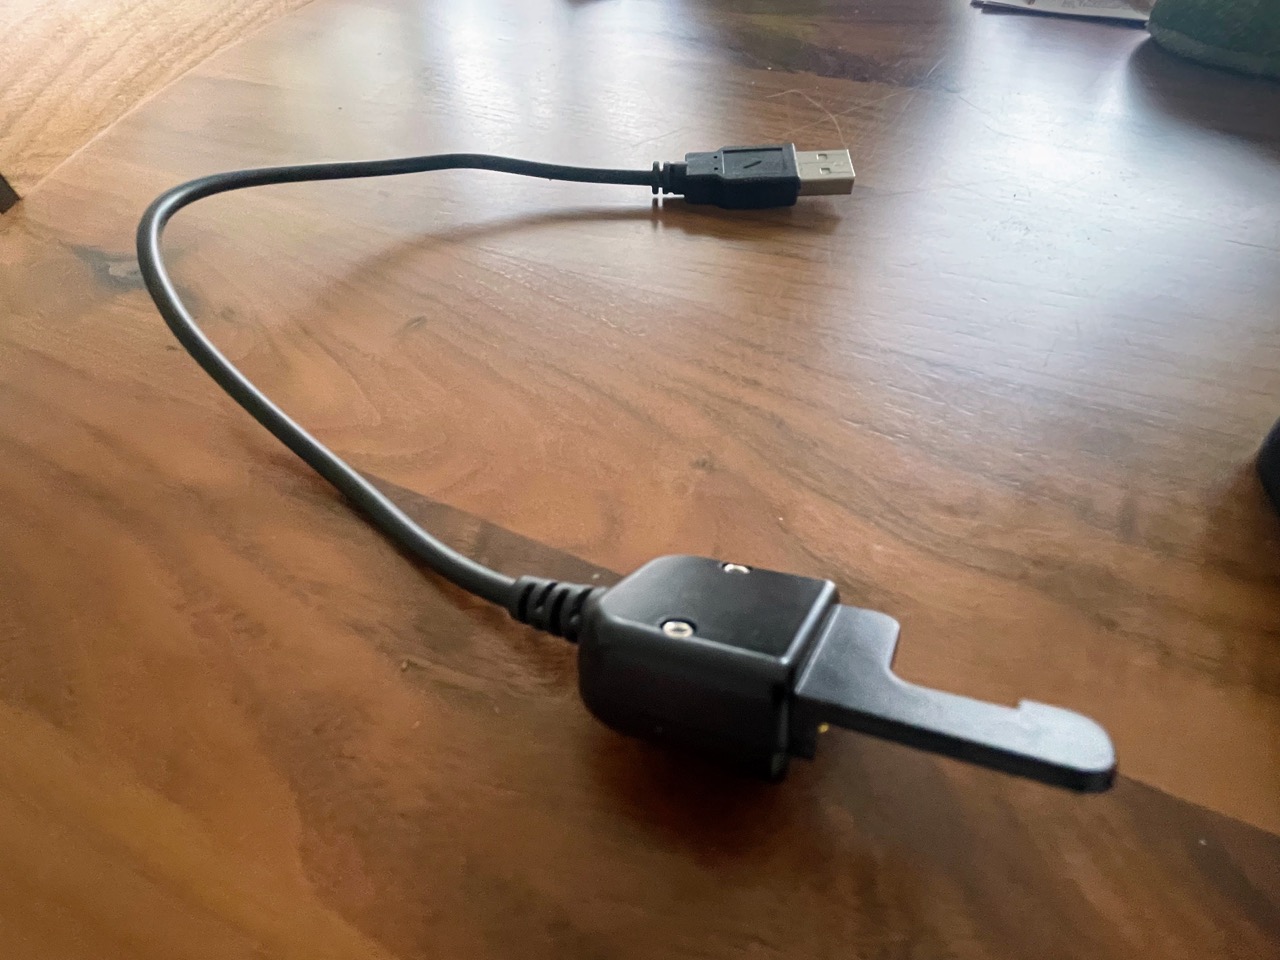
It still takes and holds a charge, and instructions on how to put it in pairing mode are printed right on the device!
Now I can check the status of the camera, pause and resume recording, and turn it on and off without having to take off my helmet. Neat! I will definitely use that on my next ride.
Battery Life #
After riding around for 1 hour and continuously recording, I still had about 60% battery left. So I should be able to ride for 3 hours at least without running out of juice. Remember that it is winter here, the temperatures are around freezing, so I expect this to be a bit better in the summer. No need to go out and buy an extra battery just yet!
Image quality #
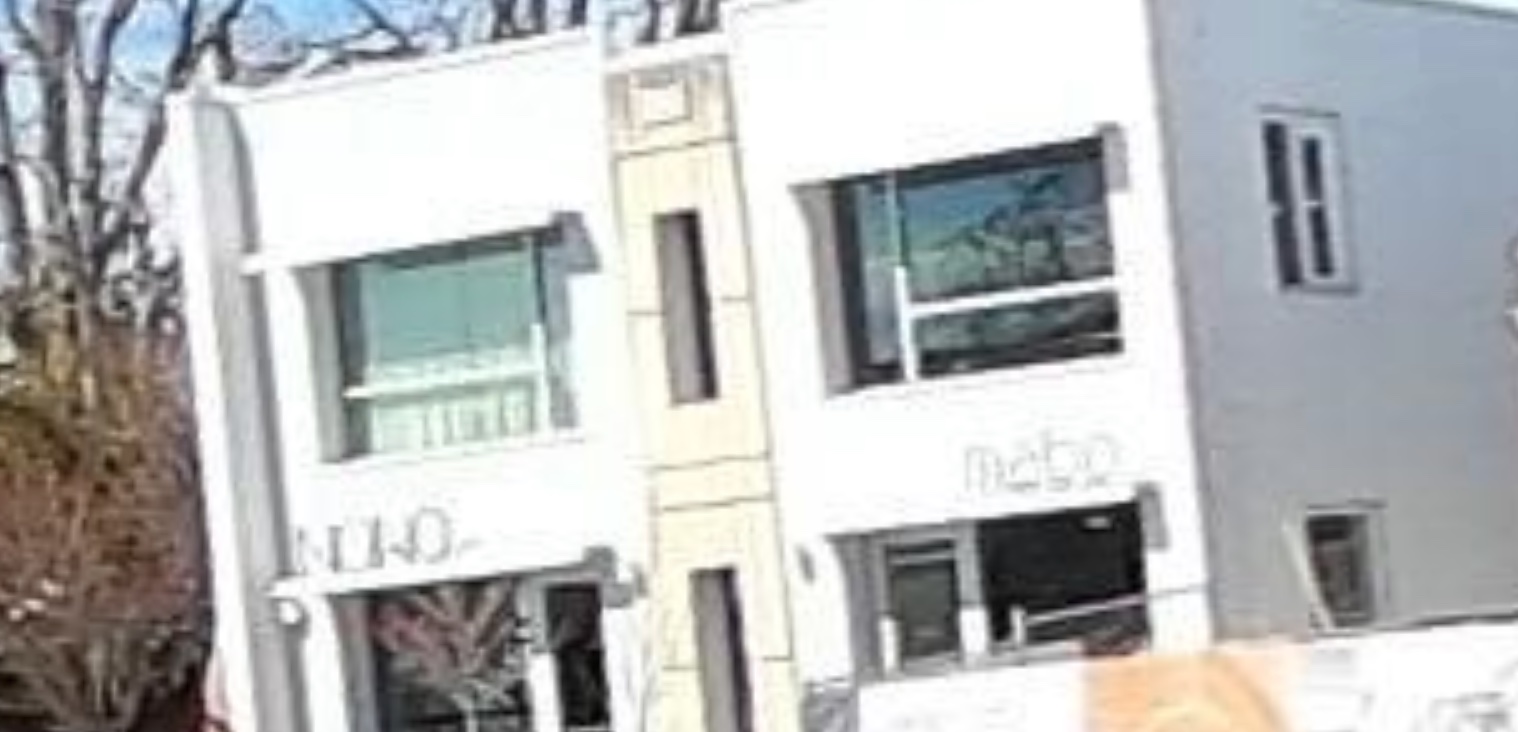
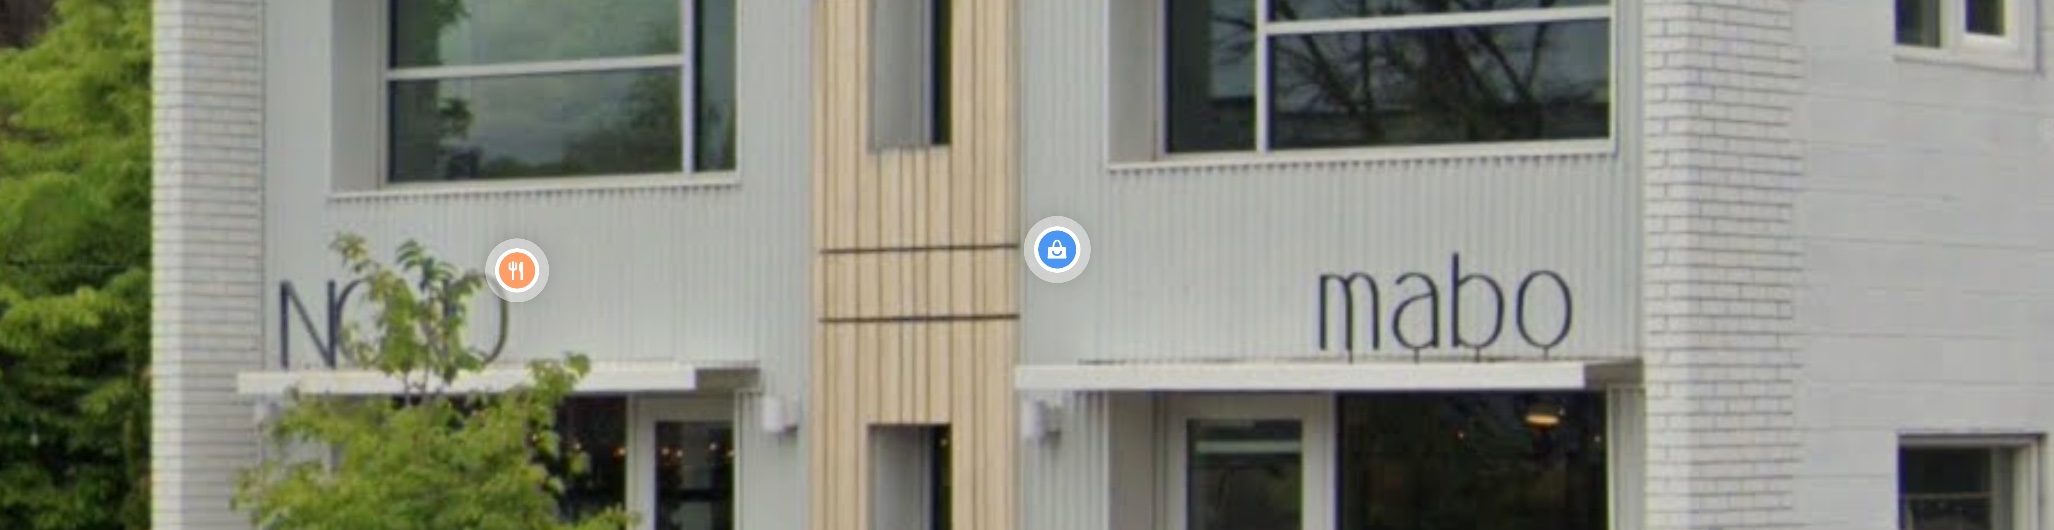
At first glance, the images look pretty nice, but that's not really what we're after. I want to be able to get details for mapping. Business names on stores are usually clear enough:

But I find that most of the time, the images are not good enough to read, for example, house numbers:
Even store signs with low contrast and / or thin lettering can become illegible. Here's my capture + a reference from Google streetview:
I don't know what GoPro or Mapillary settings I might try and change to improve image quality. Perhaps I'm just expecting too much from a consumer grade pano camera :) The images are definitely good enough to map and confirm a lot of detail.
The next frontier is mounting this camera safely on the roof of my car. That will be for another post! Happy Mapping!